xflow流程可视化-自定义属性编辑
上一篇文章主要对可视化的自定义节点的添加及生成进行说明,本篇主要介绍自定义节点的编辑功能,实现自定义节点上的各种属性的编辑。
流程图编辑面板
页面右侧的流程节点组件为FlowchartFormPanel,和自定义节点列表的组件一样,所以我们这里去除掉FlowchartFormPanel,使用原始的JsonSchemaForm进行替换,实现节点属性的更新。
添加自定义属性
我们先在创建节点时添加一些自定义属性,后面通过点击节点让属性反显在编辑框上,对其进行编辑,attribute便是我们添加的自定义属性。
// config-dnd-panel.tsx(见上一篇说明)
export const nodeDataService: NsNodeCollapsePanel.INodeDataService =
  async () => {
    // 这里可以通过接口获取节点列表
    const resData = [
      {
        id: 1,
        renderKey: 'CustomNode',
        label: '开始',
        attrs: {
          attribute: {
            type: 'aaa',
            tag: [1, 2],
          },
          style: {
            width: 280,
            height: 40,
          },
          canvansStyle: {
            width: 120,
            height: 40,
          },
        },
      },
      {
        id: 2,
        renderKey: 'CustomConnecto',
        label: '审核节点',
        attrs: {
          attribute: {
            type: 'bbb',
            tag: [2],
          },
          style: {
            width: 80,
            height: 80,
          },
          canvansStyle: {
            width: 80,
            height: 80,
          },
        },
      },
    ];
    return [
      {
        id: 'NODE',
        header: '节点',
        children: nodeList(resData),
      },
    ];
  };
自定义编辑
首先我们把上一章的组件FlowchartFormPanel删除,新建一个文件夹CustomFlowchartFormPanel,新建index.tsx、NodeComponent/index.tsx、EdgeComponent/index.tsx,CanvasService,这几个分别为我们的主视图,Node节点编辑表单,Edge连线编辑表单,Canvas主视图编辑表单。
// index.tsx
import type {
  NsNodeCmd,
  NsGraph,
  NsEdgeCmd,
  NsJsonSchemaForm,
} from '@antv/xflow';
import {
  JsonSchemaForm,
  XFlowNodeCommands,
  XFlowEdgeCommands,
} from '@antv/xflow';
import { FC } from 'react';
import { CanvasService, canvasSchema } from './CanvasService';
import NodeComponent from './NodeComponent';
import EdgeComponent from './EdgeComponent';

namespace NsJsonForm {
  export const getCustomRenderComponent: NsJsonSchemaForm.ICustomRender = (
    targetType,
    targetData,
    _modelService,
    commandService,
  ) => {
    const updateNode = (node: NsGraph.INodeConfig) => {
      return commandService.executeCommand<NsNodeCmd.UpdateNode.IArgs>(
        XFlowNodeCommands.UPDATE_NODE.id,
        { nodeConfig: node },
      );
    };
    const updateEdge = (edge: NsGraph.IEdgeConfig) => {
      return commandService.executeCommand<NsEdgeCmd.UpdateEdge.IArgs>(
        XFlowEdgeCommands.UPDATE_EDGE.id,
        { edgeConfig: edge, options: {} },
      );
    };
    if (targetType === 'node') {
      return () => (
        <NodeComponent updateNode={updateNode} targetData={targetData} />
      );
    }
    if (targetType === 'edge') {
      return () => (
        <EdgeComponent updateEdge={updateEdge} targetData={targetData} />
      );
    }
    if (targetType === 'canvas') {
      return () => <CanvasService />;
    }

    return null;
  };
  export const formSchemaService: NsJsonSchemaForm.IFormSchemaService = async (
    args,
  ) => {
    return canvasSchema();
  };
}

const CustomFlowchartFormPanel: FC = () => {
  return (
    <JsonSchemaForm
      targetType={['canvas', 'node', 'edge']}
      formSchemaService={NsJsonForm.formSchemaService}
      getCustomRenderComponent={NsJsonForm.getCustomRenderComponent}
      position={{ top: 40, bottom: 0, right: 0, width: 400 }}
    />
  );
};

export default CustomFlowchartFormPanel;
我们在getCustomRenderComponent判断选中的是节点、连线或者主视图返回对应的自定义编辑控件,需要注意的是原本xflow提供了json配置表单的方式,但是我们这里是完全自定义编辑框,故不使用内置的controlMapService,有兴趣使用内置自定义的表单渲染的同学可以查考官方文档尝试一下,注意formSchemaService还是得返回一下,否则会处于loading状态。
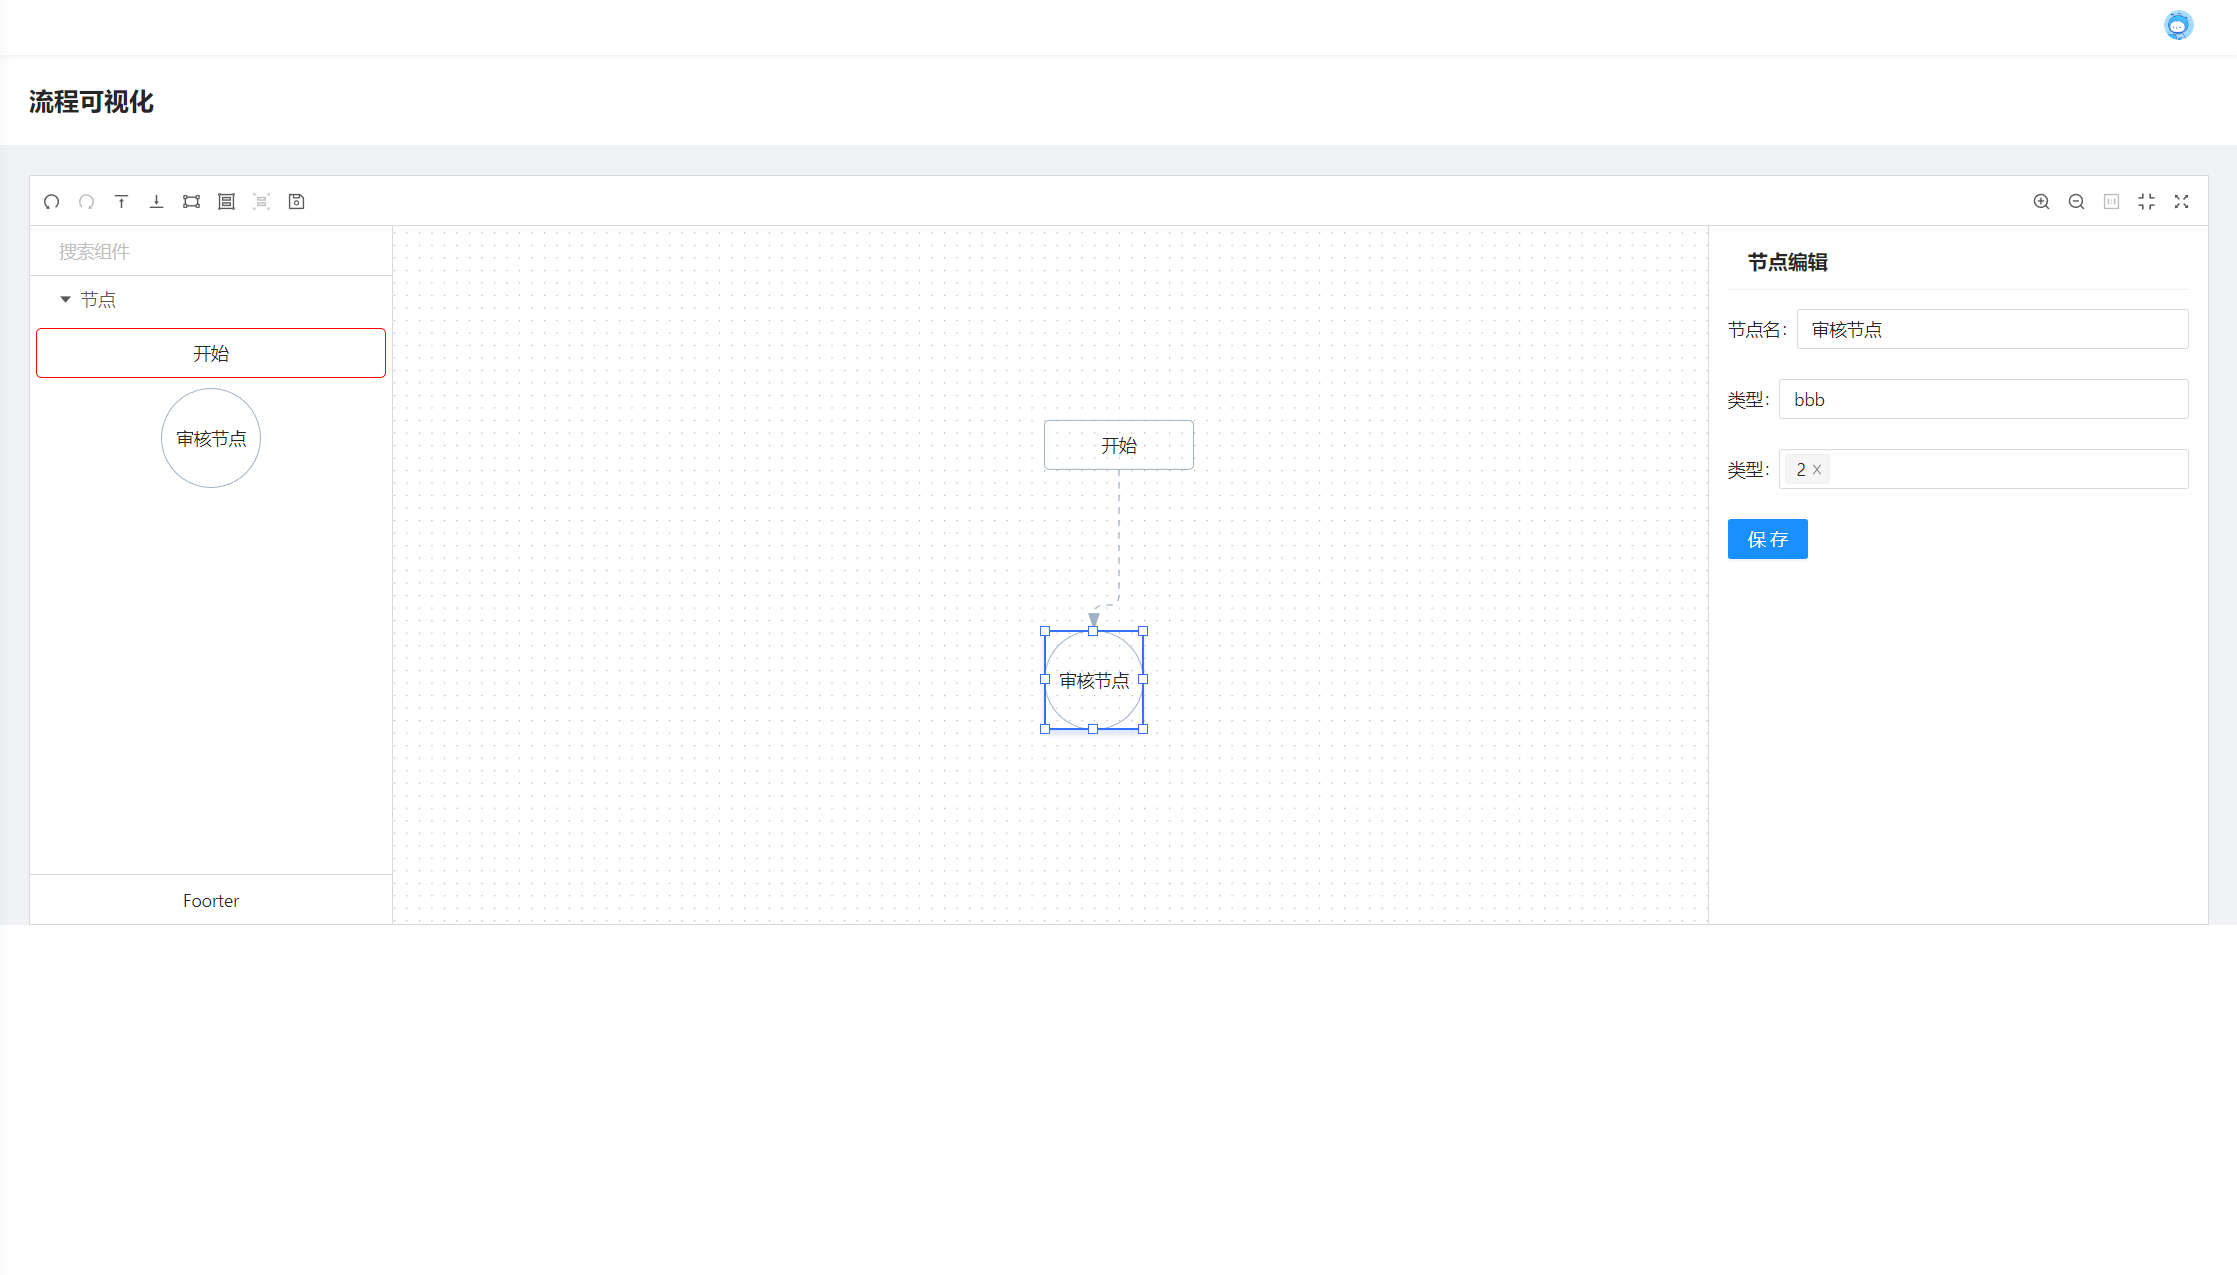
节点编辑
节点编辑组件接收两个值,updateNode为更新节点的函数,targetData为点击节点的节点属性,我们点击保存按钮时遍历表单为attribute更新对应值,Header为简单的公共header头,没啥可说的。
// NodeComponent/index.tsx
import { FC, useEffect, useState } from 'react';
import { Input, Form, Spin, Button, Select } from 'antd';
import { NsJsonSchemaForm } from '@antv/xflow';
import { set } from 'lodash';
import Header from '../Header';
import styles from './index.less';

const { Option } = Select;

interface NodeComponentProps {
  updateNode: any;
  targetData: NsJsonSchemaForm.TargetData;
}

const NodeComponent: FC<NodeComponentProps> = (props) => {
  const { updateNode, targetData } = props;
  const [loading, setLoading] = useState(true);
  const [form] = Form.useForm();

  useEffect(() => {
    form.setFieldsValue({
      label: targetData?.label,
      ...targetData?.attrs?.attribute,
    });
    setLoading(false);
  }, [targetData]);

  const onFinish = (values: any) => {
    const data: any = {
      ...targetData,
    };
    Object.keys(values).forEach((key: any) => {
      if (key === 'label') {
        set(data, key, values[key]);
      } else {
        set(data.attrs.attribute, key, values[key]);
      }
    });
    updateNode(data);
  };

  return (
    <div className={styles.nodeComponent}>
      <Header title="节点编辑" />
      <Spin spinning={loading}>
        <Form form={form} onFinish={onFinish}>
          <Form.Item name="label" label="节点名">
            <Input />
          </Form.Item>
          <Form.Item name="type" label="类型">
            <Input />
          </Form.Item>
          <Form.Item name="tag" label="类型">
            <Select mode="multiple">
              <Option key={1}>1</Option>
              <Option key={2}>2</Option>
            </Select>
          </Form.Item>
          <Button type="primary" htmlType="submit">
            保存
          </Button>
        </Form>
      </Spin>
    </div>
  );
};

export default NodeComponent;
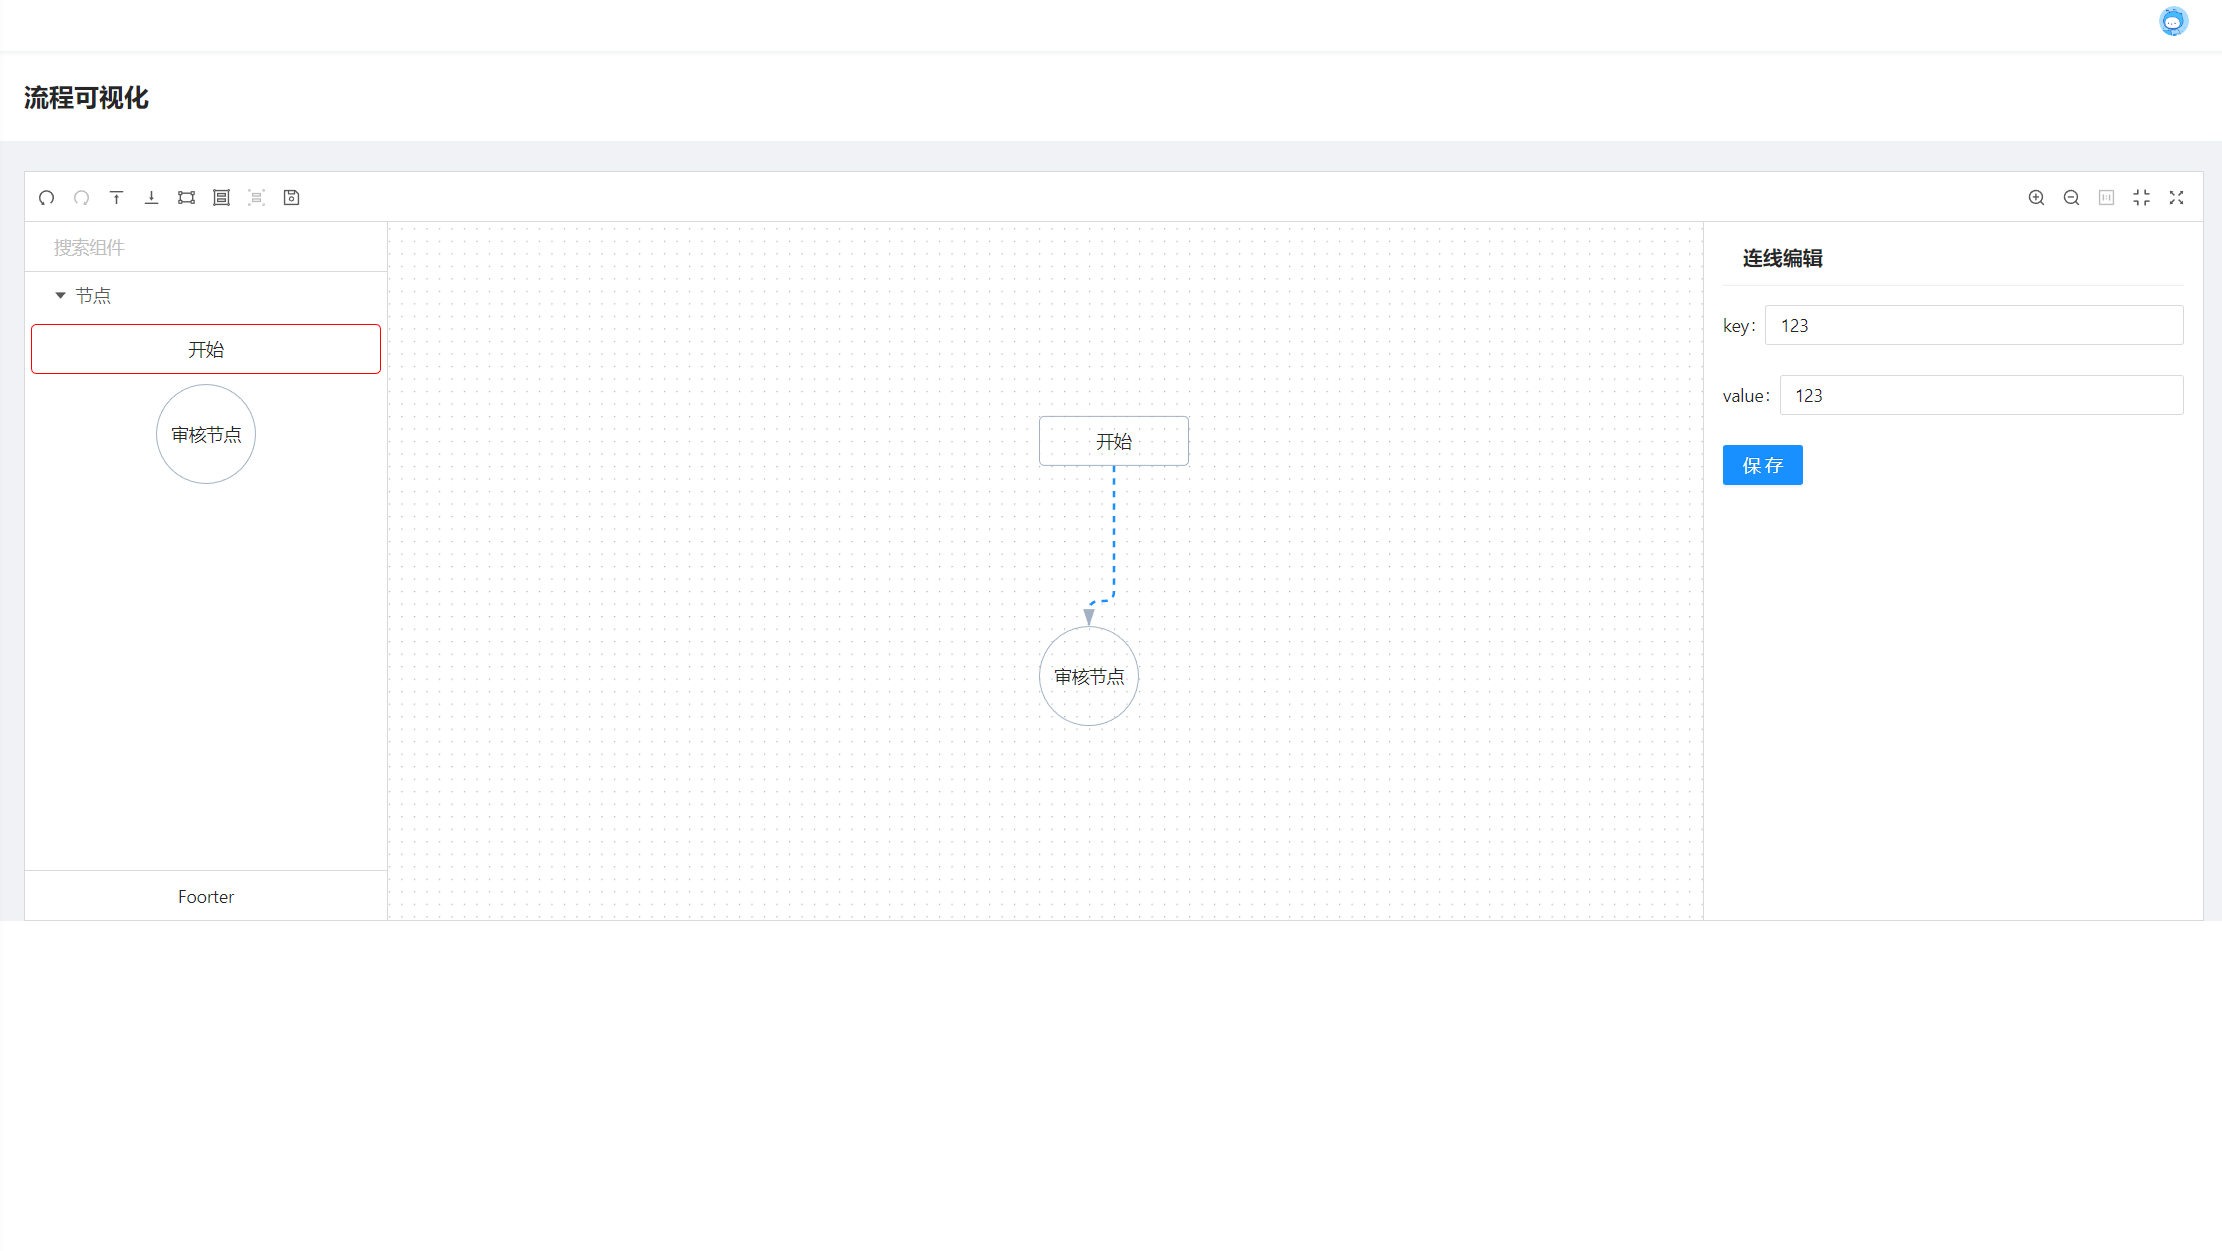
连线编辑
连线编辑和节点编辑类似,就不做过多说明,需要注意的是连线attrs中初始并没有attribute,所以我们做了一个判断为其添加一个空attribute属性。
// EdgeComponent/index.tsx
import { NsJsonSchemaForm } from '@antv/xflow';
import { Input, Button, Form, Spin } from 'antd';
import { set } from 'lodash';
import { FC, useEffect, useState } from 'react';
import Header from '../Header';
import styles from './index.less';
interface EdgeComponentProps {
  updateEdge: any;
  targetData: NsJsonSchemaForm.TargetData;
}

const EdgeComponent: FC<EdgeComponentProps> = (props) => {
  const { updateEdge, targetData } = props;
  const [loading, setLoading] = useState(true);
  const [form] = Form.useForm();

  useEffect(() => {
    form.setFieldsValue({
      ...targetData?.attrs?.attribute,
    });
    setLoading(false);
  }, [targetData]);

  const onFinish = (values: any) => {
    const data: any = {
      ...targetData,
    };
    Object.keys(values).forEach((key: any) => {
      if (!data.attrs?.attribute) {
        set(data.attrs, 'attribute', {});
      }
      set(data.attrs.attribute, key, values[key]);
    });
    updateEdge(data);
  };

  return (
    <div className={styles.edgeComponent}>
      <Header title="连线编辑" />
      <Spin spinning={loading}>
        <Form form={form} onFinish={onFinish}>
          <Form.Item name="key" label="key">
            <Input />
          </Form.Item>
          <Form.Item name="value" label="value">
            <Input />
          </Form.Item>
          <Button type="primary" htmlType="submit">
            保存
          </Button>
        </Form>
      </Spin>
    </div>
  );
};

export default EdgeComponent;
画布展示
画布这里就不作编辑了,我们直接写点文字
// CanvasService.tsx
import Header from './Header';

const CanvasService = () => {
  return (
    <div style={{ padding: '15px' }}>
      <Header title="主画布" />
    </div>
  );
};

const canvasSchema = () => {
  return {
    tabs: [
      {
        /** Tab的title */
        name: '画布配置',
        groups: [],
      },
    ],
  };
};

export { CanvasService, canvasSchema };
尝试修改节点以及连线上的属性,保存后再保存整个流程(上一期我们把数据存储在localStorage中)并刷新页面,再次点击节点与连线,看修改后的是否能成功反显出来。
好了,这样我们的自定义节点编辑就基本完成了,实现了节点以及连线上的自定义属性编辑及反显,一个基本的流程可视化功能基本上就完成了,但是呢现在的编辑功能有一些缺点,比如自定义属性需要确定其类型,我们的编辑需要用什么控件来渲染编辑,添加属性都需要编辑控件代码添加对应的表单,不能添加任意属性,那么有什么办法可以解决这个问题,让我们可以随意添加属性,不改动代码就能渲染成我们想要的表单呢,这就是我们下一篇优化的内容:使用formliy生成自定义表单对节点属性进行编辑,尽情期待。


近期评论